Timeslice with invisible slices
- Felix

- Jul 30, 2021
- 2 min read
Updated: Sep 1, 2021
Today I will show you step by step how you can create a timeslice with invisible slices in Adobe Premiere Pro. A timeslice is a photo or video which usually combines different stages of a sunset or sunrise in one frame like the one below.

You need:
a timelapse video of a sunset or sunrise, less cloud movement usually works best
video editing software like Premiere Pro
Create a new sequence (1080x1080 for Instagram) and put your clip to the beginning of the timeline. Right click your “tracks” panel and add as many tracks as you need to reach 20 video tracks.

Move the playhead to the beginning of the timeline. By holding “Shift” and hitting the “Right Arrow” key on your keyboard move forward 15 frames. Then duplicate your timelapse by holding “Alt” and dragging it to video track two. Move forward another 15 frames and copy your clip again. Repeat this process until you have filled all video layers
and your timeline looks like this:

In the effects tab type “crop” and add this effect to the second clip of your timeline. Set “Left” to 5% and “Edge Feather” to a high amount like 100. The amount of feather you need depends on the type of video you are creating, so play around with this setting to achieve a result which you like.

Copy the crop effect from track two to track three and change “Left” to 10%. Keep copying the effect to all the above video tracks and add 5% each time. At the last track you should have a crop of 95%

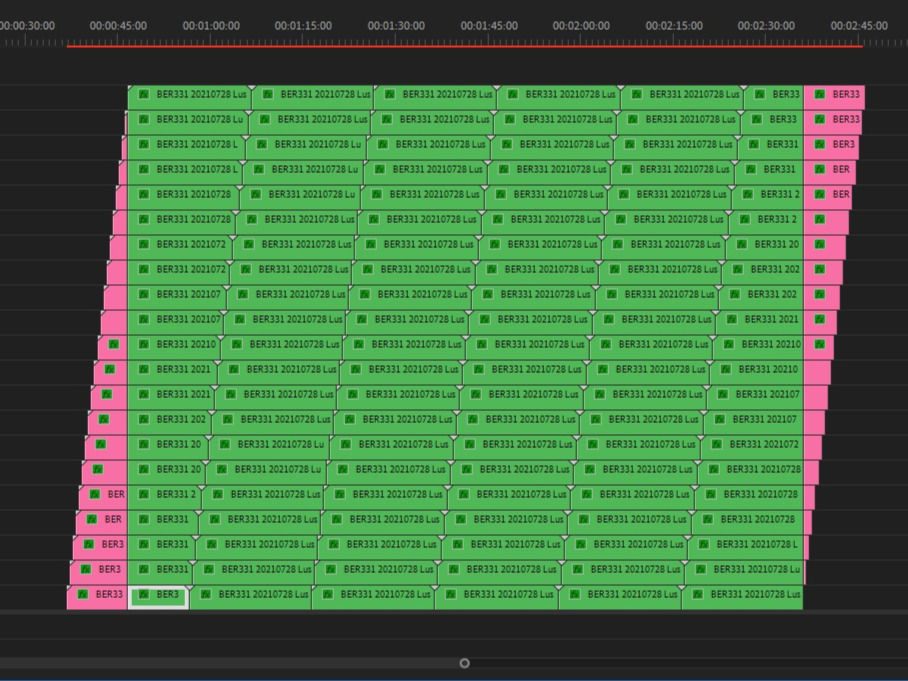
Copy all clips and place them right behind the first ones. Use the shortcut “Cmd + R” and reverse the second batch of clips. Now copy all four batches again and place them right behind. The reversed clips are marked red.

To clean up the video place the playhead on the beginning of the top clip in the sequence and hit “Cmd + Shift + K” to cut through all clips. Delete the left part and repeat this procedure for the end of your stack of clips (cut red parts below).

Now you can nest the whole stack, add some music and upload it to social media to get millions of like.
Make sure to tag me (@berlin.lapse) in your Instagram or other social posts if you used this tutorial to create a timeslice.


Comments